Have you looked at your kitchen backsplash recently? I mean, really looked at it. It has a huge impact on the look and feel of your kitchen.
Let’s be honest – most standard backsplashes are basic at best. The mass-produced ceramic tiles that builders slap on there do the job functionally, but just barely. Aesthetically? Let’s just say they leave much to be desired.
You’ve probably contemplated swapping it out for something new. Something that brings life to your kitchen. But who has the time, energy and budget for a major renovation? Not you!
The good news is with some strategic tweaks and upgrades, it’s possible to give the backsplash a fresh new look, without the headache of a full blown remodel.
7 Simple Kitchen Backsplash Renovation Ideas
With a touch of creativity, you can implement simple upgrades that transform your backsplash from drab to fab.
I’ll explore seven quick and easy renovation ideas to give your backsplash and kitchen a fresh new look.
From paint to tiles and everything in between, these simple solutions will turn your backsplash into a beautiful, functional focal point full of wow-factor style.
1. Paint It Bold for an Easy Update
Paint might seem too simple, but don’t underestimate its transformative power! With the right color and product, you can use paint to give all kinds of backsplash materials a whole new look.
For ceramic tile and glass, cleaning is key prior to painting. Give it a good scrub and lightly sand to help the paint adhere. Enamel paints are your best bet – the glossy finish resists moisture and cleans easily. A satin or semi-gloss sheen adds stylish dimension.
Painting wood backsplashes? Make sure to sand and prime first for smooth and long-lasting results. Acrylic paint adheres well and dries fast. A matte or flat finish highlights wood texture.
Looking for trendy hues? Navy, emerald green, and matte black are sophisticated. Soft pastels like blush pink and sage green are fresh and airy. Even metallic paint adds modern glam.
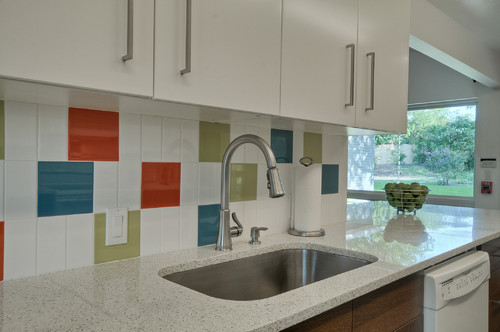
Not feeling monochromatic? Do an ombre paint job transitioning from light to dark. Or get graphic with painter’s tape and do two tones! The options are endless.
PRO TIP: Make sure there’s adequate ventilation and drying time for the paint, especially for enclosed backsplash areas. But it’ll be so worth it for your dazzling new focal point!
2. Picture Perfect Mural for Personalized Style
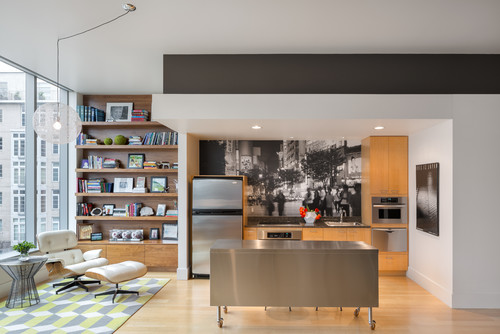
Want your backsplash to truly represent you? Use a custom photographic mural to give your kitchen unique character and wow factor.
Maybe it’s a collage of family memories. An artsy pattern or texture. A scenic landscape. There are many options when you can choose any image for your mural.
Many online services, like this one and this one, print high quality murals on durable, water-resistant vinyl – perfect for your backsplash splash zone. Upload your photos or browse their image libraries until you find “the one.”
PRO TIP: If your kitchen’s cramped, focus on a close up or detailed section of the image. For a spacious luxury kitchen, think big with a panoramic mural.
Once your mural arrives, carefully measure and map out the backsplash area. Clean the surface thoroughly before applying adhesive and smoothing the mural into place. Wrap edges neatly and top with a sealant.
With a photo mural backsplash, you can infuse personal memories, favorite places, or unique designs into your kitchen decor.
3. Tin Tiles for Vintage-Inspired Style
Want to channel turn-of-the-century charm in your kitchen? Tin tiles lend antique elegance without breaking the bank.
Gleaming pressed tin tiles were a sign of luxury back in the day. While genuine tin carries a hefty price tag, faux metal tiles capture the look for less.
Made of aluminum or plastic, faux tin tiles click together easily. Imagine sipping your morning coffee enveloped by a silvery geometric mosaic. Doesn’t that sound exquisite?
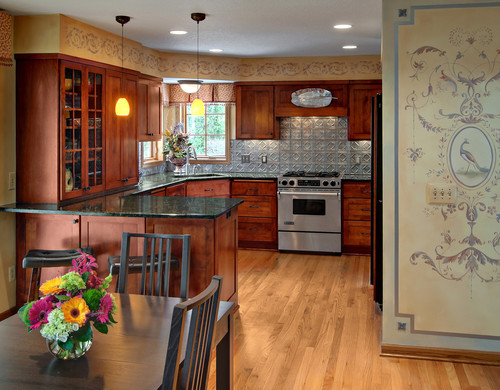
Though luxury looking, limit tin tiles to a single focal area. They pair beautifully with stainless steel appliances in small doses. Too much tin can feel cold and outdated.
PRO TIP: To create a textural intrigue, install tin tiles in a herringbone pattern or metallic mosaic for a dynamic look.
But used thoughtfully, a tin backsplash injects timeless glamour into modern kitchens. For a fresh take, mix metal tiles with painted or stained wood. The combo feels rich yet livable.
4. Wood for Cozy Rustic Charm
Want to infuse farmhouse character into your kitchen? Wood paneling on the backsplash creates natural warmth and texture.
Start by measuring your backsplash area and cutting shiplap or tongue-and-groove boards to fit. Pine, cedar, and fir work nicely. Apply your preferred stain or paint now before installing.
Buttercream for cottage vibes? Minty green for a pop of color? Gray wash for an airy coastal feel? The options suit any style.
Attach the boards with liquid nails adhesive and finishing nails, making sure they are secure and even. Fill any cracks with caulk for a seamless look.
Don’t forget to seal the wood with a water-resistant stain or polyurethane. This protects your craftsmanship from splatters and moisture. Reapply yearly.
As you gather around the farmhouse table for home cooked meals, your wood backsplash steals the show. Its handcrafted look and natural grain warms up any space.
5. Modern Mirror for a Glam Reflective Style
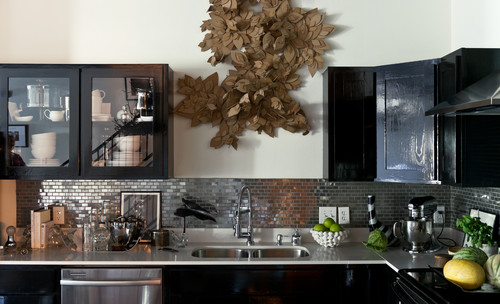
Turn your backsplash into a glittering work of art with light-reflecting mirrored tiles. Their raw, liquid-like shine catapults your kitchen into cutting-edge luxury.
Sleek glass tiles come in an array of sizes so you can dial up the drama. Tiny mosaic tiles lend eye-catching sophistication. Prefer minimalism? Choose larger mirrored sheets.
Many self-adhesive mirrored tiles make for easy application. Measure carefully, then stick tiles directly onto the existing backsplash. Smooth any bubbles for a flawless look.
Finish with luminous metal grout in sleek silver or bronze. If the mirror makes a bold statement, keep countertops and cabinets subdued.
Keep your glamorous mirrored backsplash sparkling with vinegar-based glass cleaner and a microfiber cloth. Avoid abrasive sponges that could scratch the surface.
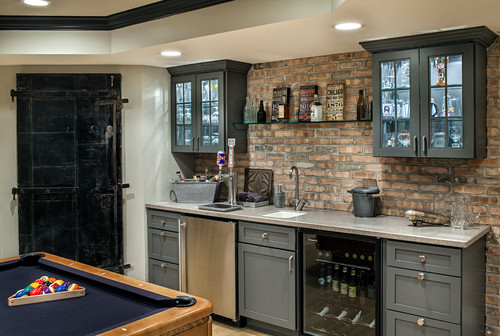
6. Exposed Brick for Blending Rustic Charm With Modern Appeal
Want to accent your kitchen with timeworn character? Exposed brick blends rustic charm with modern appeal for the best of both worlds.
Leaning into the farmhouse vibe? Distressed brick pops against natural wood counters and cabinets. Fill the space with textiles, woven baskets, and iron accents for cozy chic ambiance.
Prefer an industrial edge? Polished brick paired with stainless steel, concrete, and black metal fixtures brings gritty sophistication. Think subway tile, track lighting, and sleek lines.
For rustic allure with contemporary refinement, seamlessly incorporate brick into a modern farmhouse style. Crisp white cabinetry, marble counters, and reclaimed wood offer fresh contrast.
PRO TIP: If structural brick isn’t feasible, faux brick veneers and removable panels offer color and pattern flexibility. Play with varied hues and arrangements.
However you envision it, exposed brick infuses character and adds an element of timeless, artisanal appeal. Blend it with modern or traditional elements to suit your unique style.
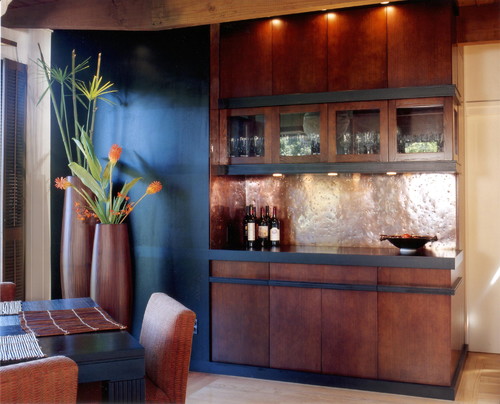
7. Copper for a Touch of Elegance
Copper adds an air of sophistication, glamour, and vintage flair.
Though it evokes imagery of 1920s prohibition bars, copper transcends a singular theme. Its luminous rose-gold shine and inherent warmth feel refined in any setting.
For a subtle touch, incorporate small copper squares into the backsplash design. Mix with marble, stone, or matte tiles for texture and contrast.
This is an excellent way to complement existing copper sinks, faucets, or range hoods. Tie the full space together with metallic glimmer.
If you’re feeling bold, expand the copper coverage. Subway tiles, geometric mosaics, or sweeping hammered panels make a dramatic impact.
Or go for a standout artisan copper sink as the jewel of your kitchen. With its handcrafted appeal, this fiery focal point commands attention.
Smart Planning Pointers for Your Kitchen Backsplash Redesign
Here are some key things to remember when planning your backsplash renovation:
Sustainability First: Refreshing your backsplash is also a great chance to make eco-conscious choices. Low-VOC paints keep indoor air fresh.
Reclaimed wood from demolition sites gives authentic character. Keep the environment in mind.
Know Your Limits: While many backsplash projects can be DIY, don’t be afraid to call in a pro for tricky tasks.
Natural stone, glass tiles, or structural changes may require an expert hand. Make sure you feel confident tackling each step.
Work Within Your Budget: Luckily, there are ways to revamp your backsplash on a budget.
Faux tin tiles, contact paper accents, or stenciling offer high-style impact for less. Creativity conquers cost concerns!
Options for Everyone: Renters and novice DIYers also have backsplash options.
Peel-and-stick tiles, removable wallpaper, or other non-permanent upgrades allow you to refresh without commitment. Roll up your sleeves and give it a go!
With smart planning and care, you can carry out a backsplash renovation suited to your skills, style, and budget.
Conclusion
The options I’ve covered prove it’s possible to completely transform your kitchen with minimal effort. A fresh coat of paint, custom mural, or modern mirrored tiles can turn that boring blank space into a beautiful focal point.
I’d love to see your beautiful “before and after” pics when you give your backsplash new life. Share your stories and ideas to motivate other readers.
The next time you’re stirring a pot or washing dishes, take pride in the stunning backdrop you brought to life. A minor change with major impact.

